Making Progress in the Homeschool/Laundry Room Renovation
Note: This project was sponsored in-kind by Lowe’s Home Improvement. We are so thankful for the way they provided supplies and products to make this project possible in a house that required the full bank budget in just structural upgrades. And I’m thankful for you for interacting with content like this that are fully transparent in the process/design to allow partnerships like this in an effort help others.
A Peak at Progress
I’m so excited to share the final reveal with you. We finished the space up this last week and took photos of the finished project today! It was so satisfying styling and putting the finishing touches on a room that has been on my mind since November 2020 and in the works since January 2021. Before I share the reveal, I need to share how we got there!
The Laundry Wall
The Power of a Paint Sprayer
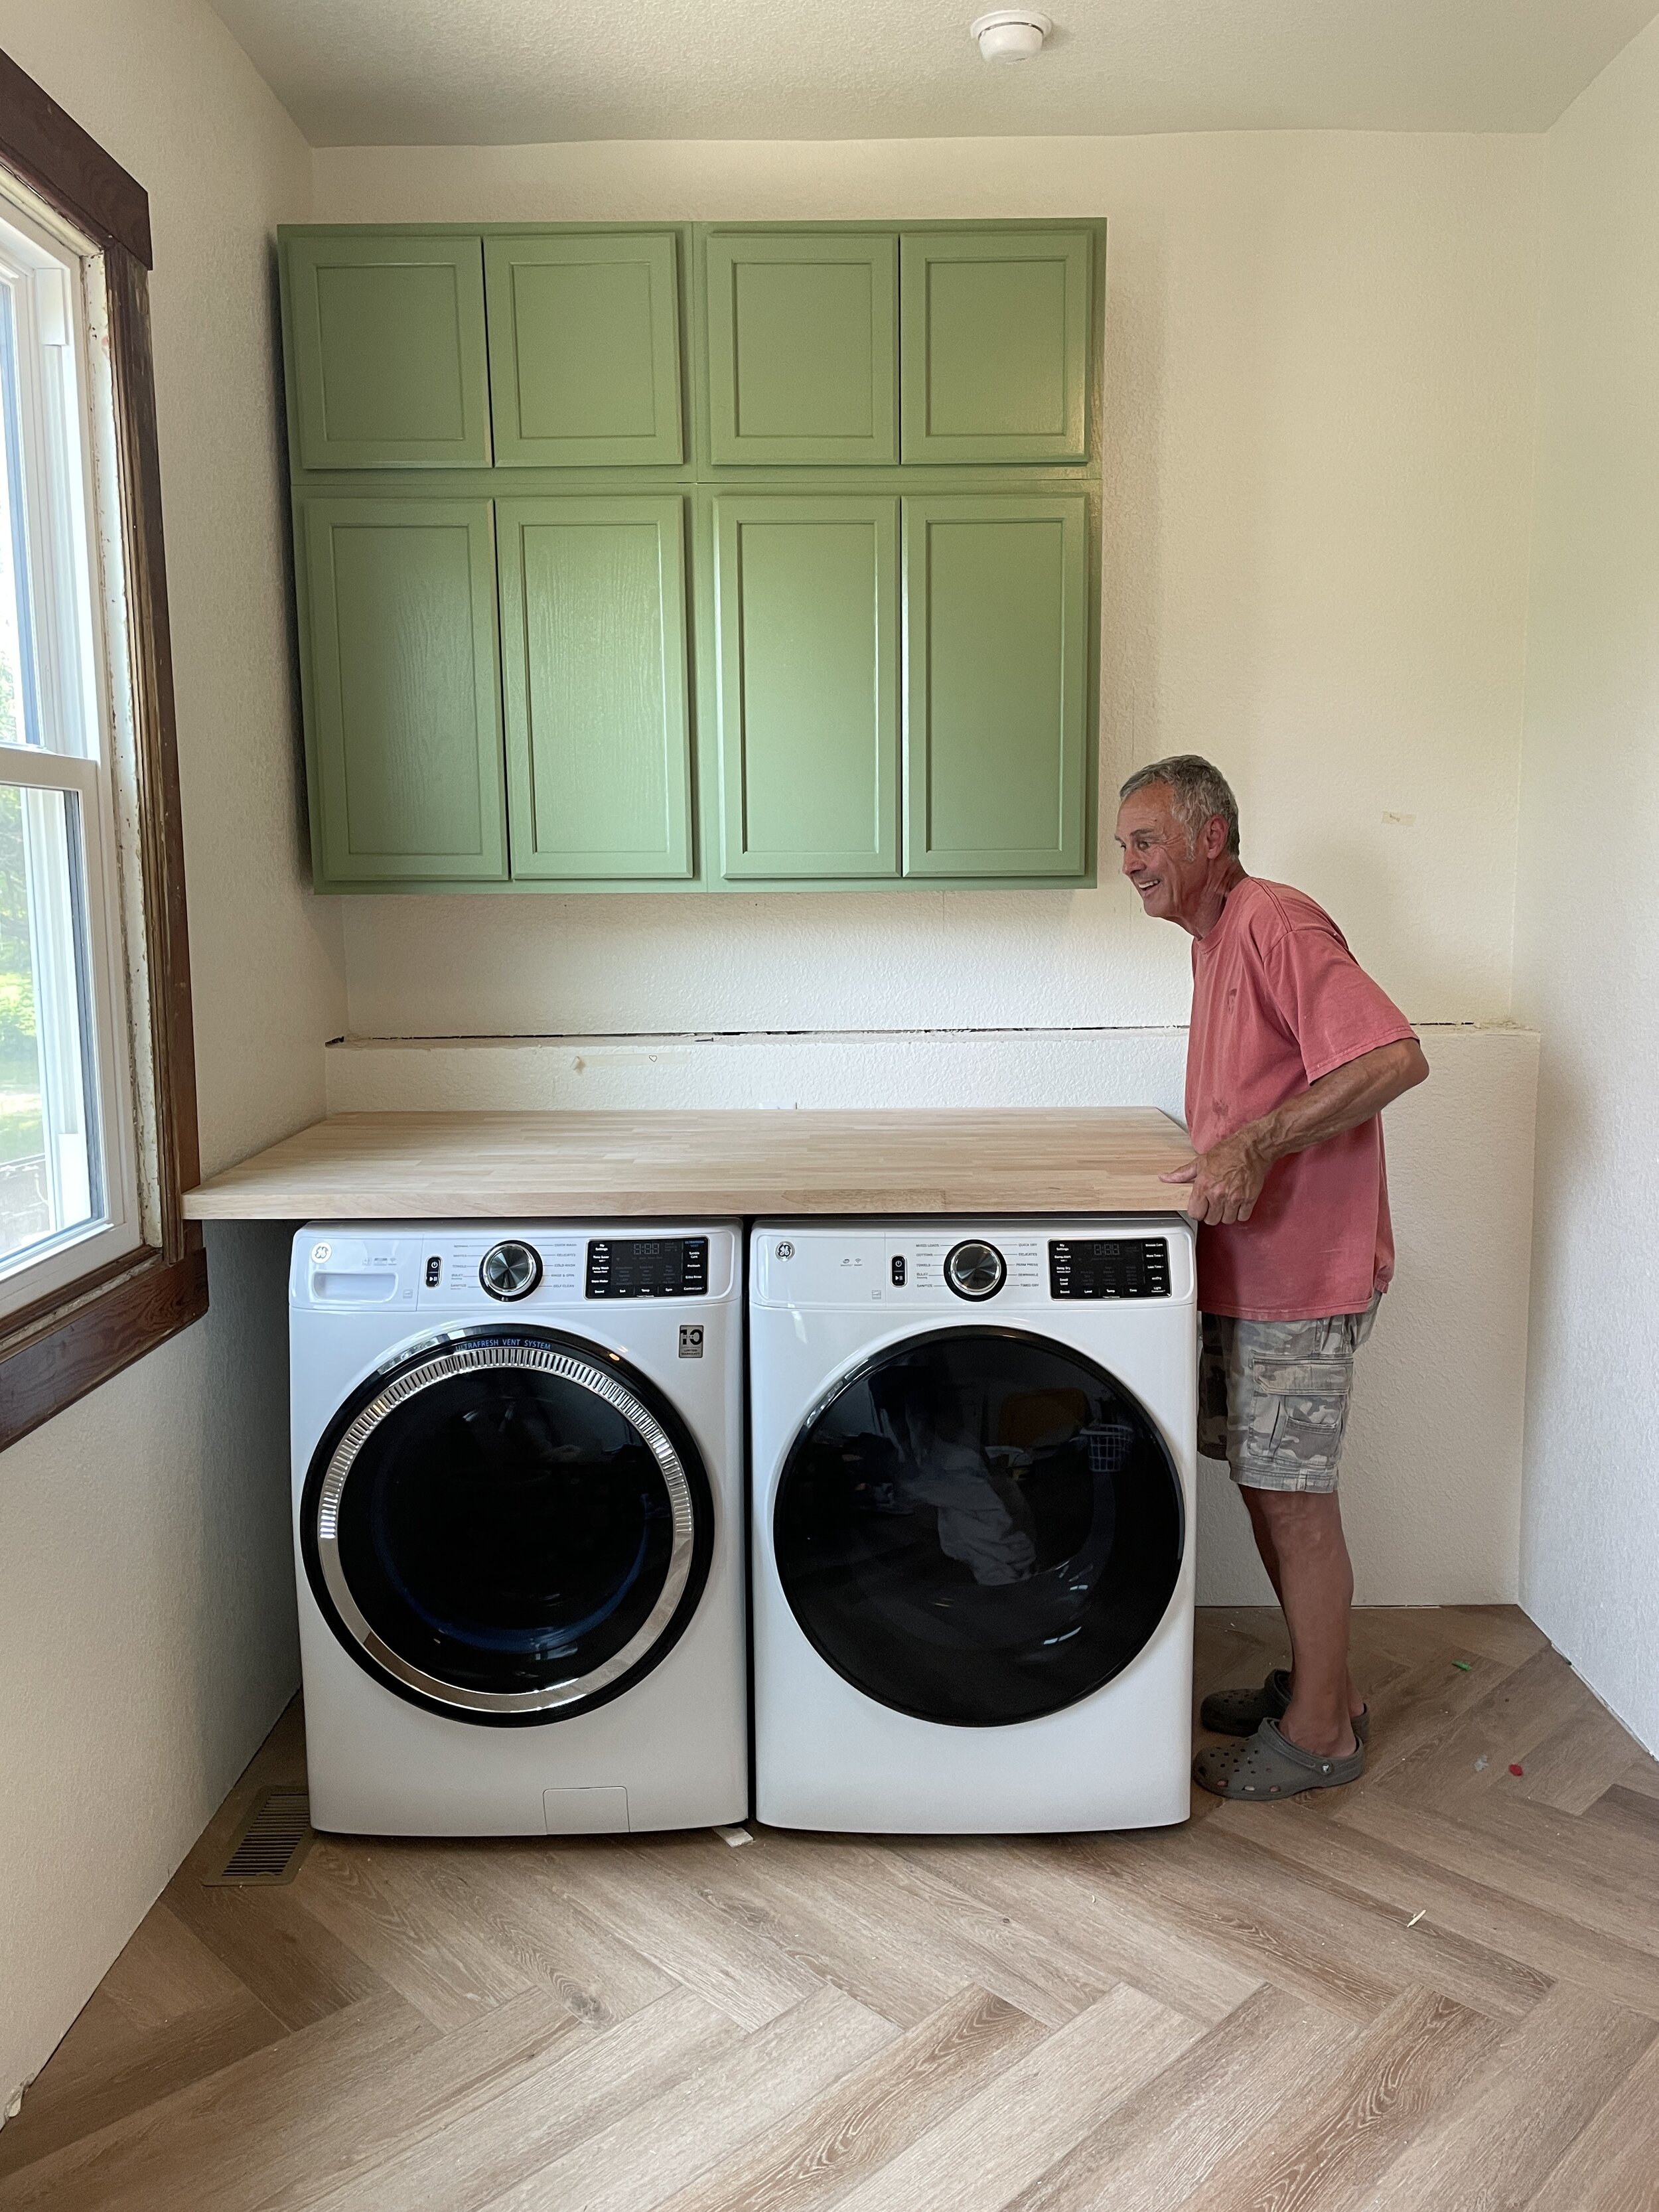
Since this space needed to be traditional, utilitarian and an inspiring room for childhood learning, I chose a bright, bold green for the cabinets and more subtle colors and finishes elsewhere. Green is a traditional color used in Victorian homes while this specific color feels youthful and invigorating.
To create the custom-painted cabinets, I purchased 4 wall cabinets — (2) 30x30x12 and (2) 30x18x12. My husband, Austin, and my father-in-law, Roger, removed the cabinet doors, rolled on Valspar bonding primer, and sprayed Cactus Shadow onto the cabinet boxes and doors using a small paint sprayer. If it sounds easy, it’s because it was. The cabinets cured in our basement and then Austin took them to his bother’s house to install.


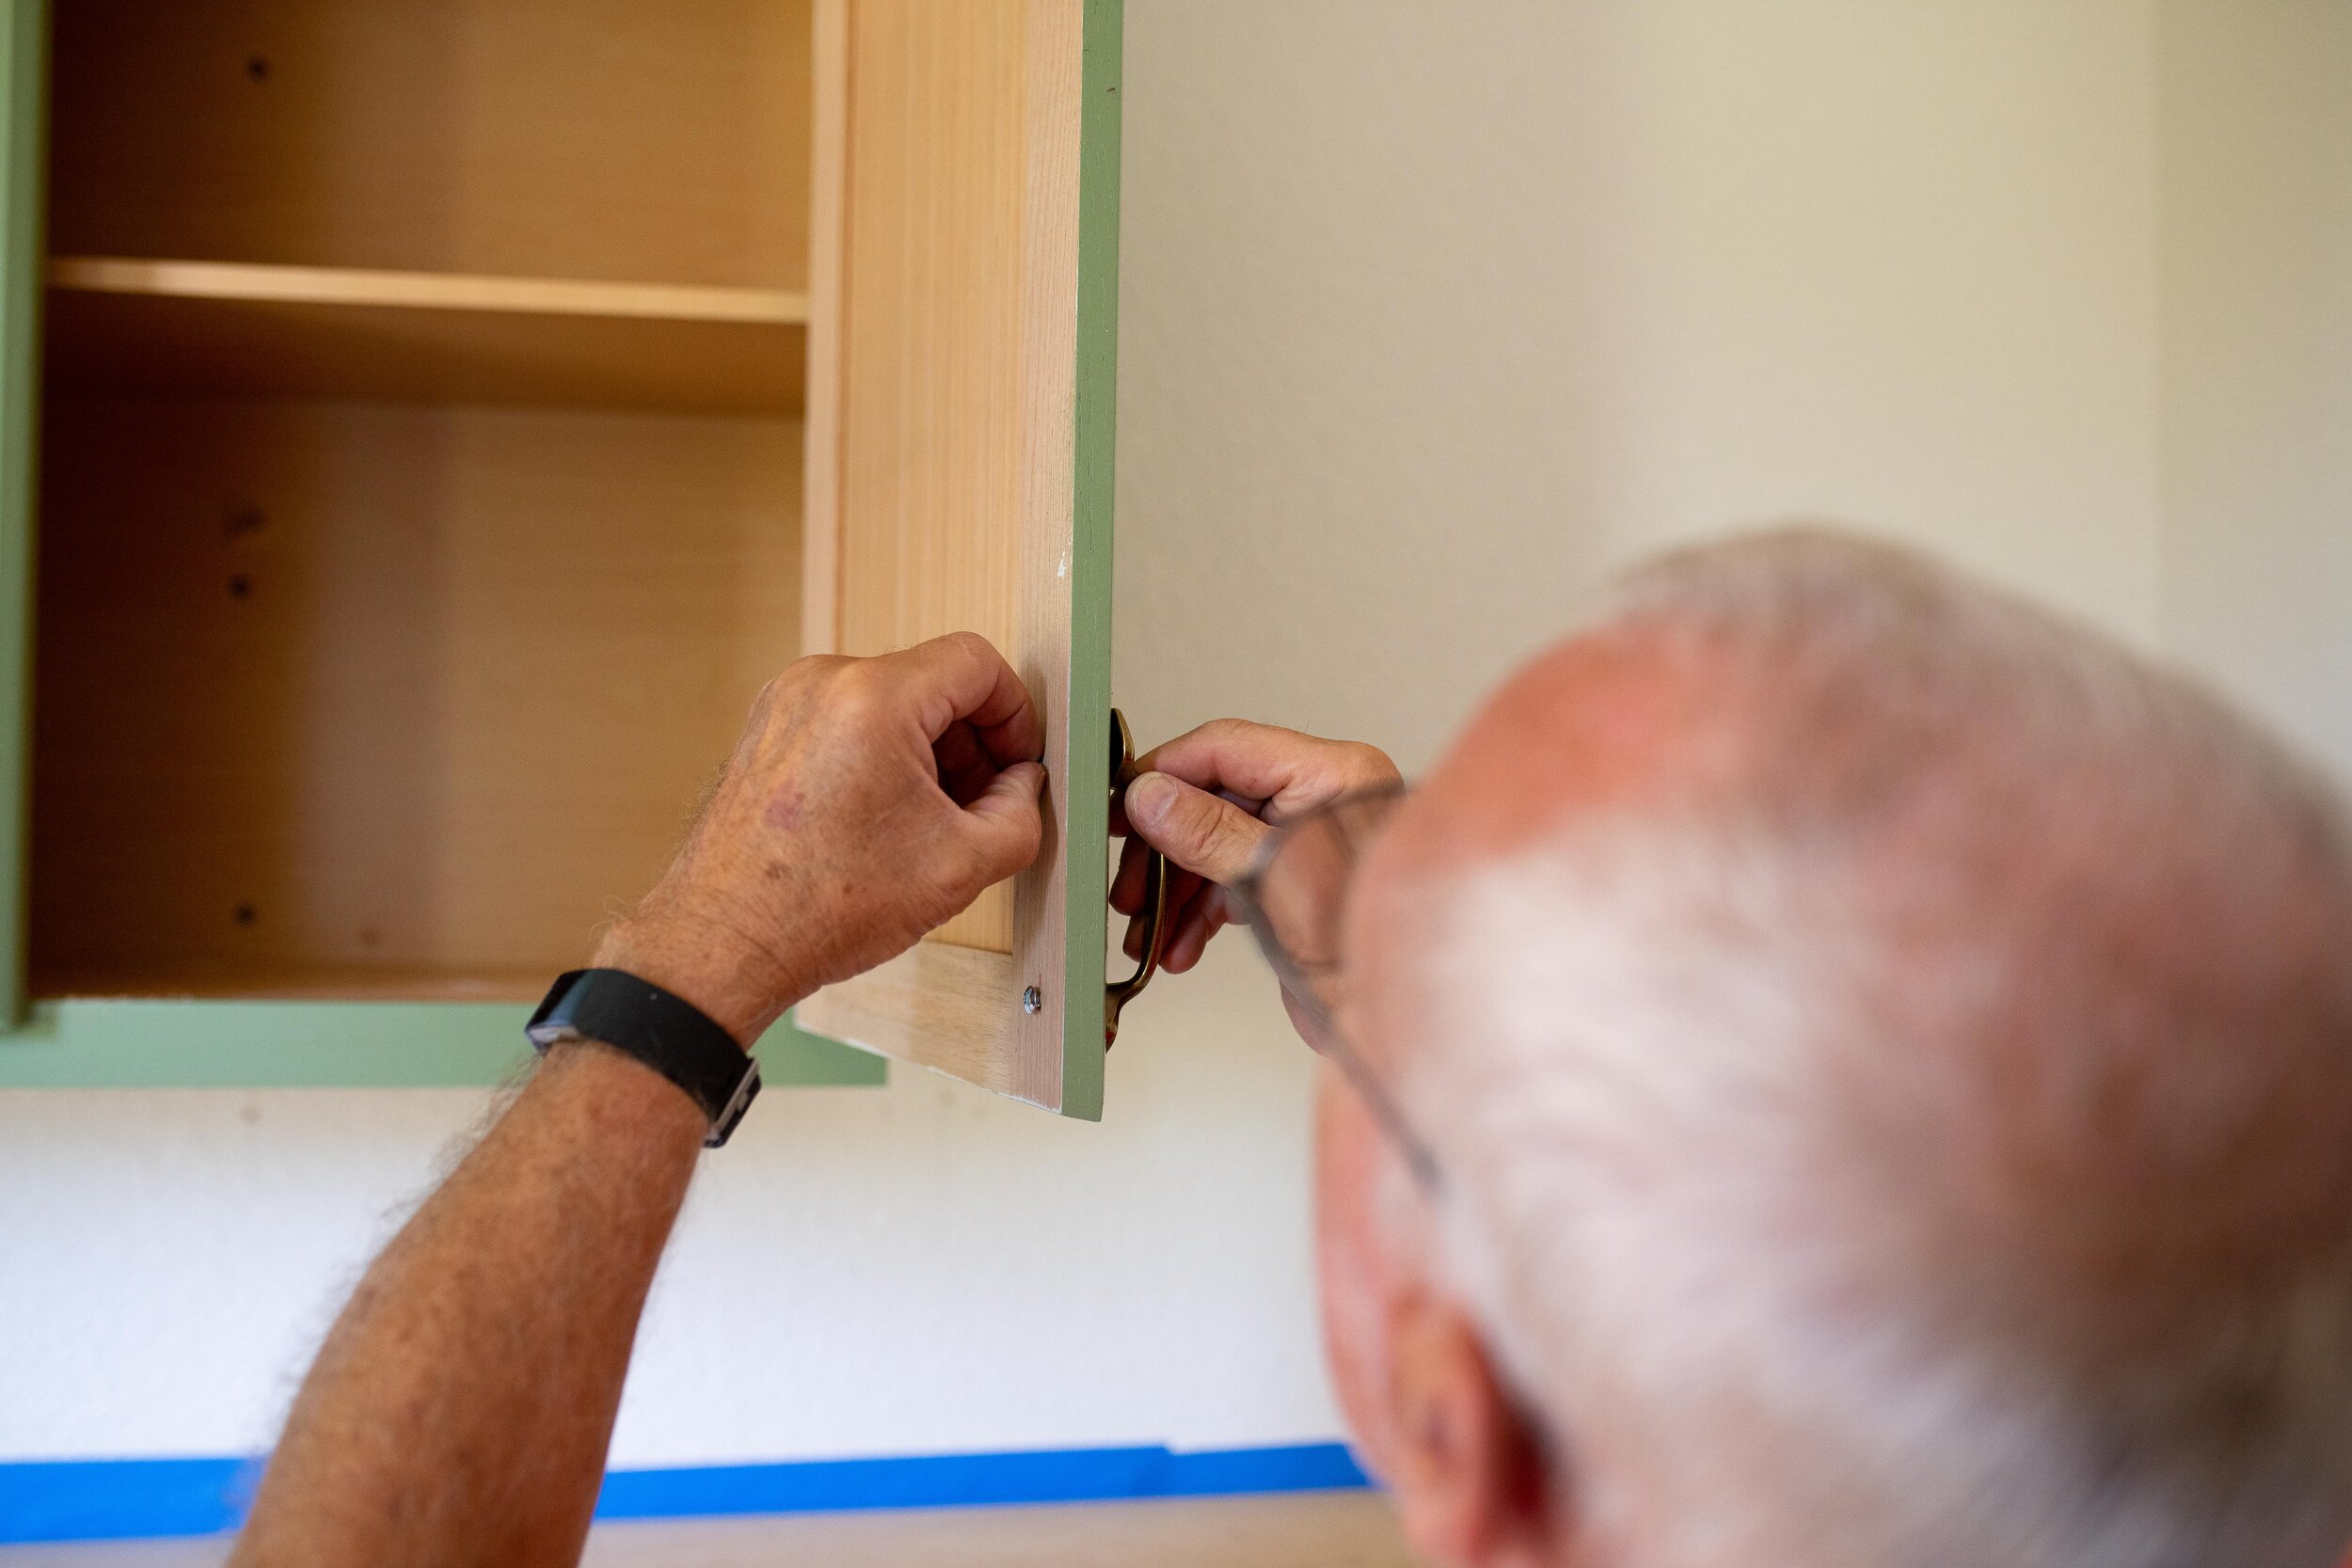
Installing Cabinets
Austin and his Uncle Kraig found the studs and installed the cabinets individually to the wall and then to each other. Austin measured the exposed side of the cabinets and cut a panel out of 1/4” plywood to cover the seam. Because this board was painted when the cabinets were, Kraig used painter’s tap to cut along with the saw to prevent splinters and paint chips. They reattached the cabinet doors. They applied the outside corner crown molding and then used a small hardware jig to attach hardware in the correct spots.


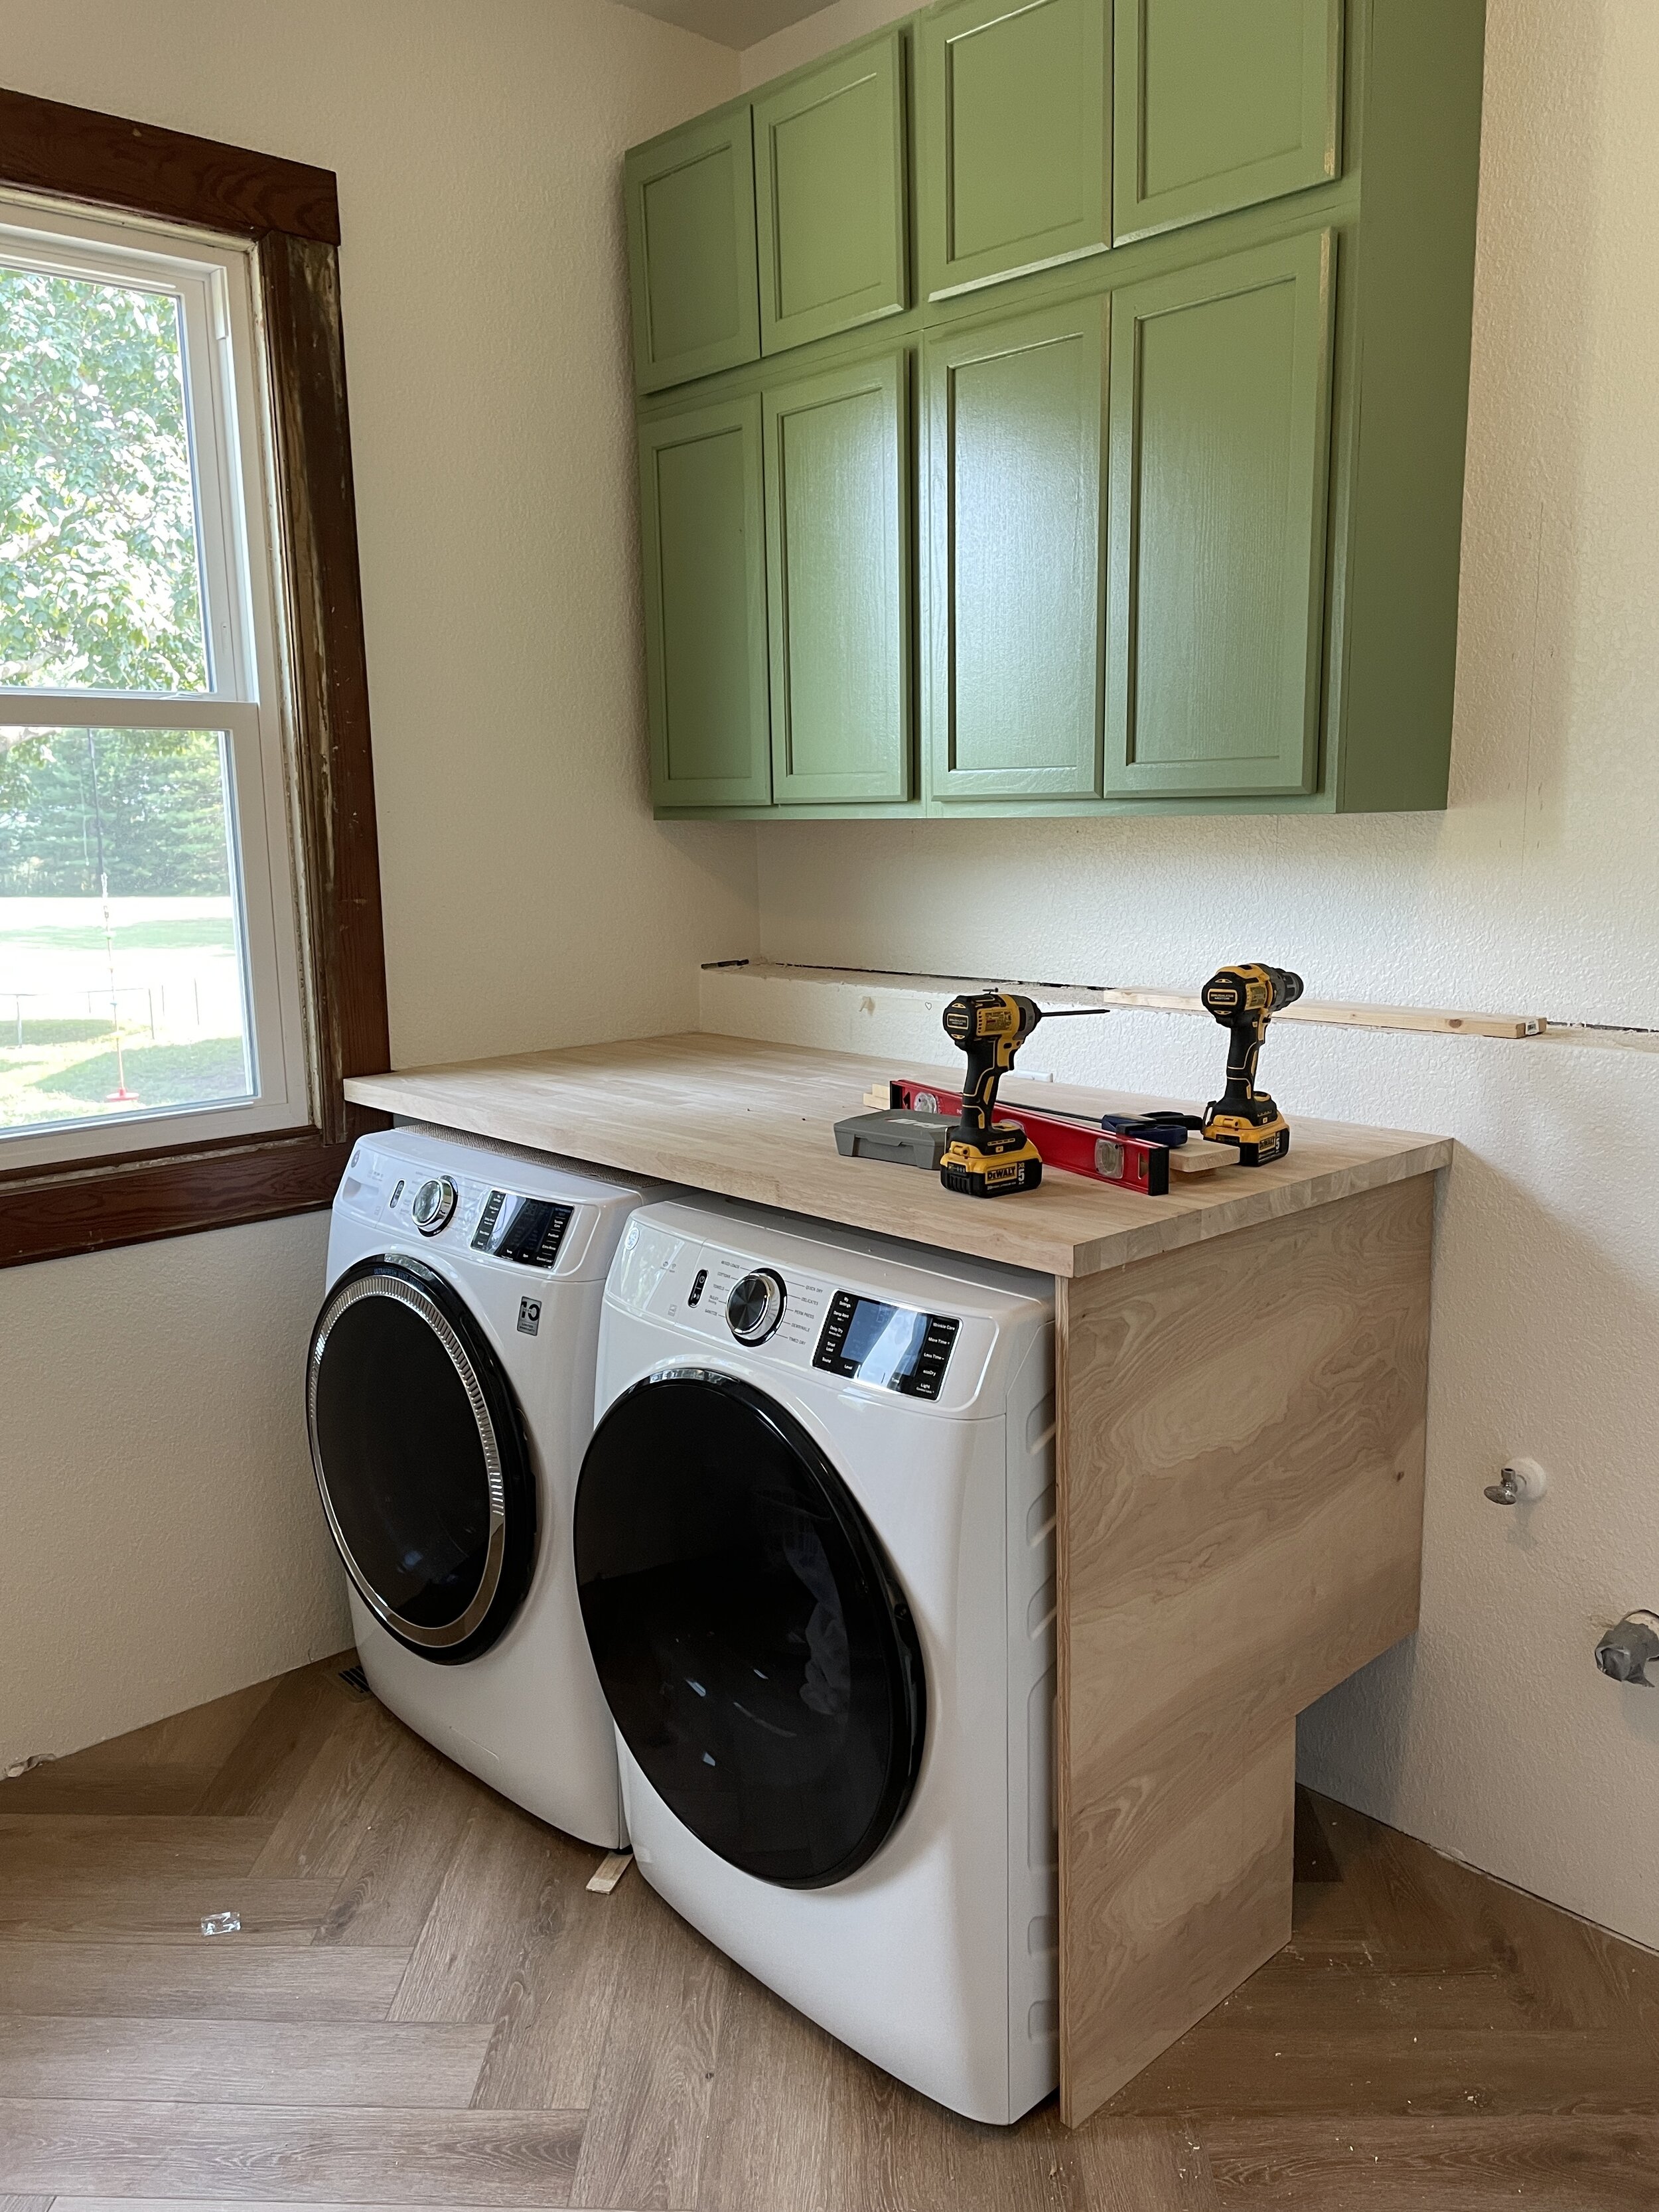
Laundry Counter and Sink
The extra deep butcher block countertop was a game changer. We were planning to adhere two standard butcher block counters together. When Austin found this one at Lowe’s, it simplified installation. Austin and his uncle cut it down to the depth and width needed. They used furring strips on the side and back wall along with a piece of maple plywood to the right of the dryer to support the counter.


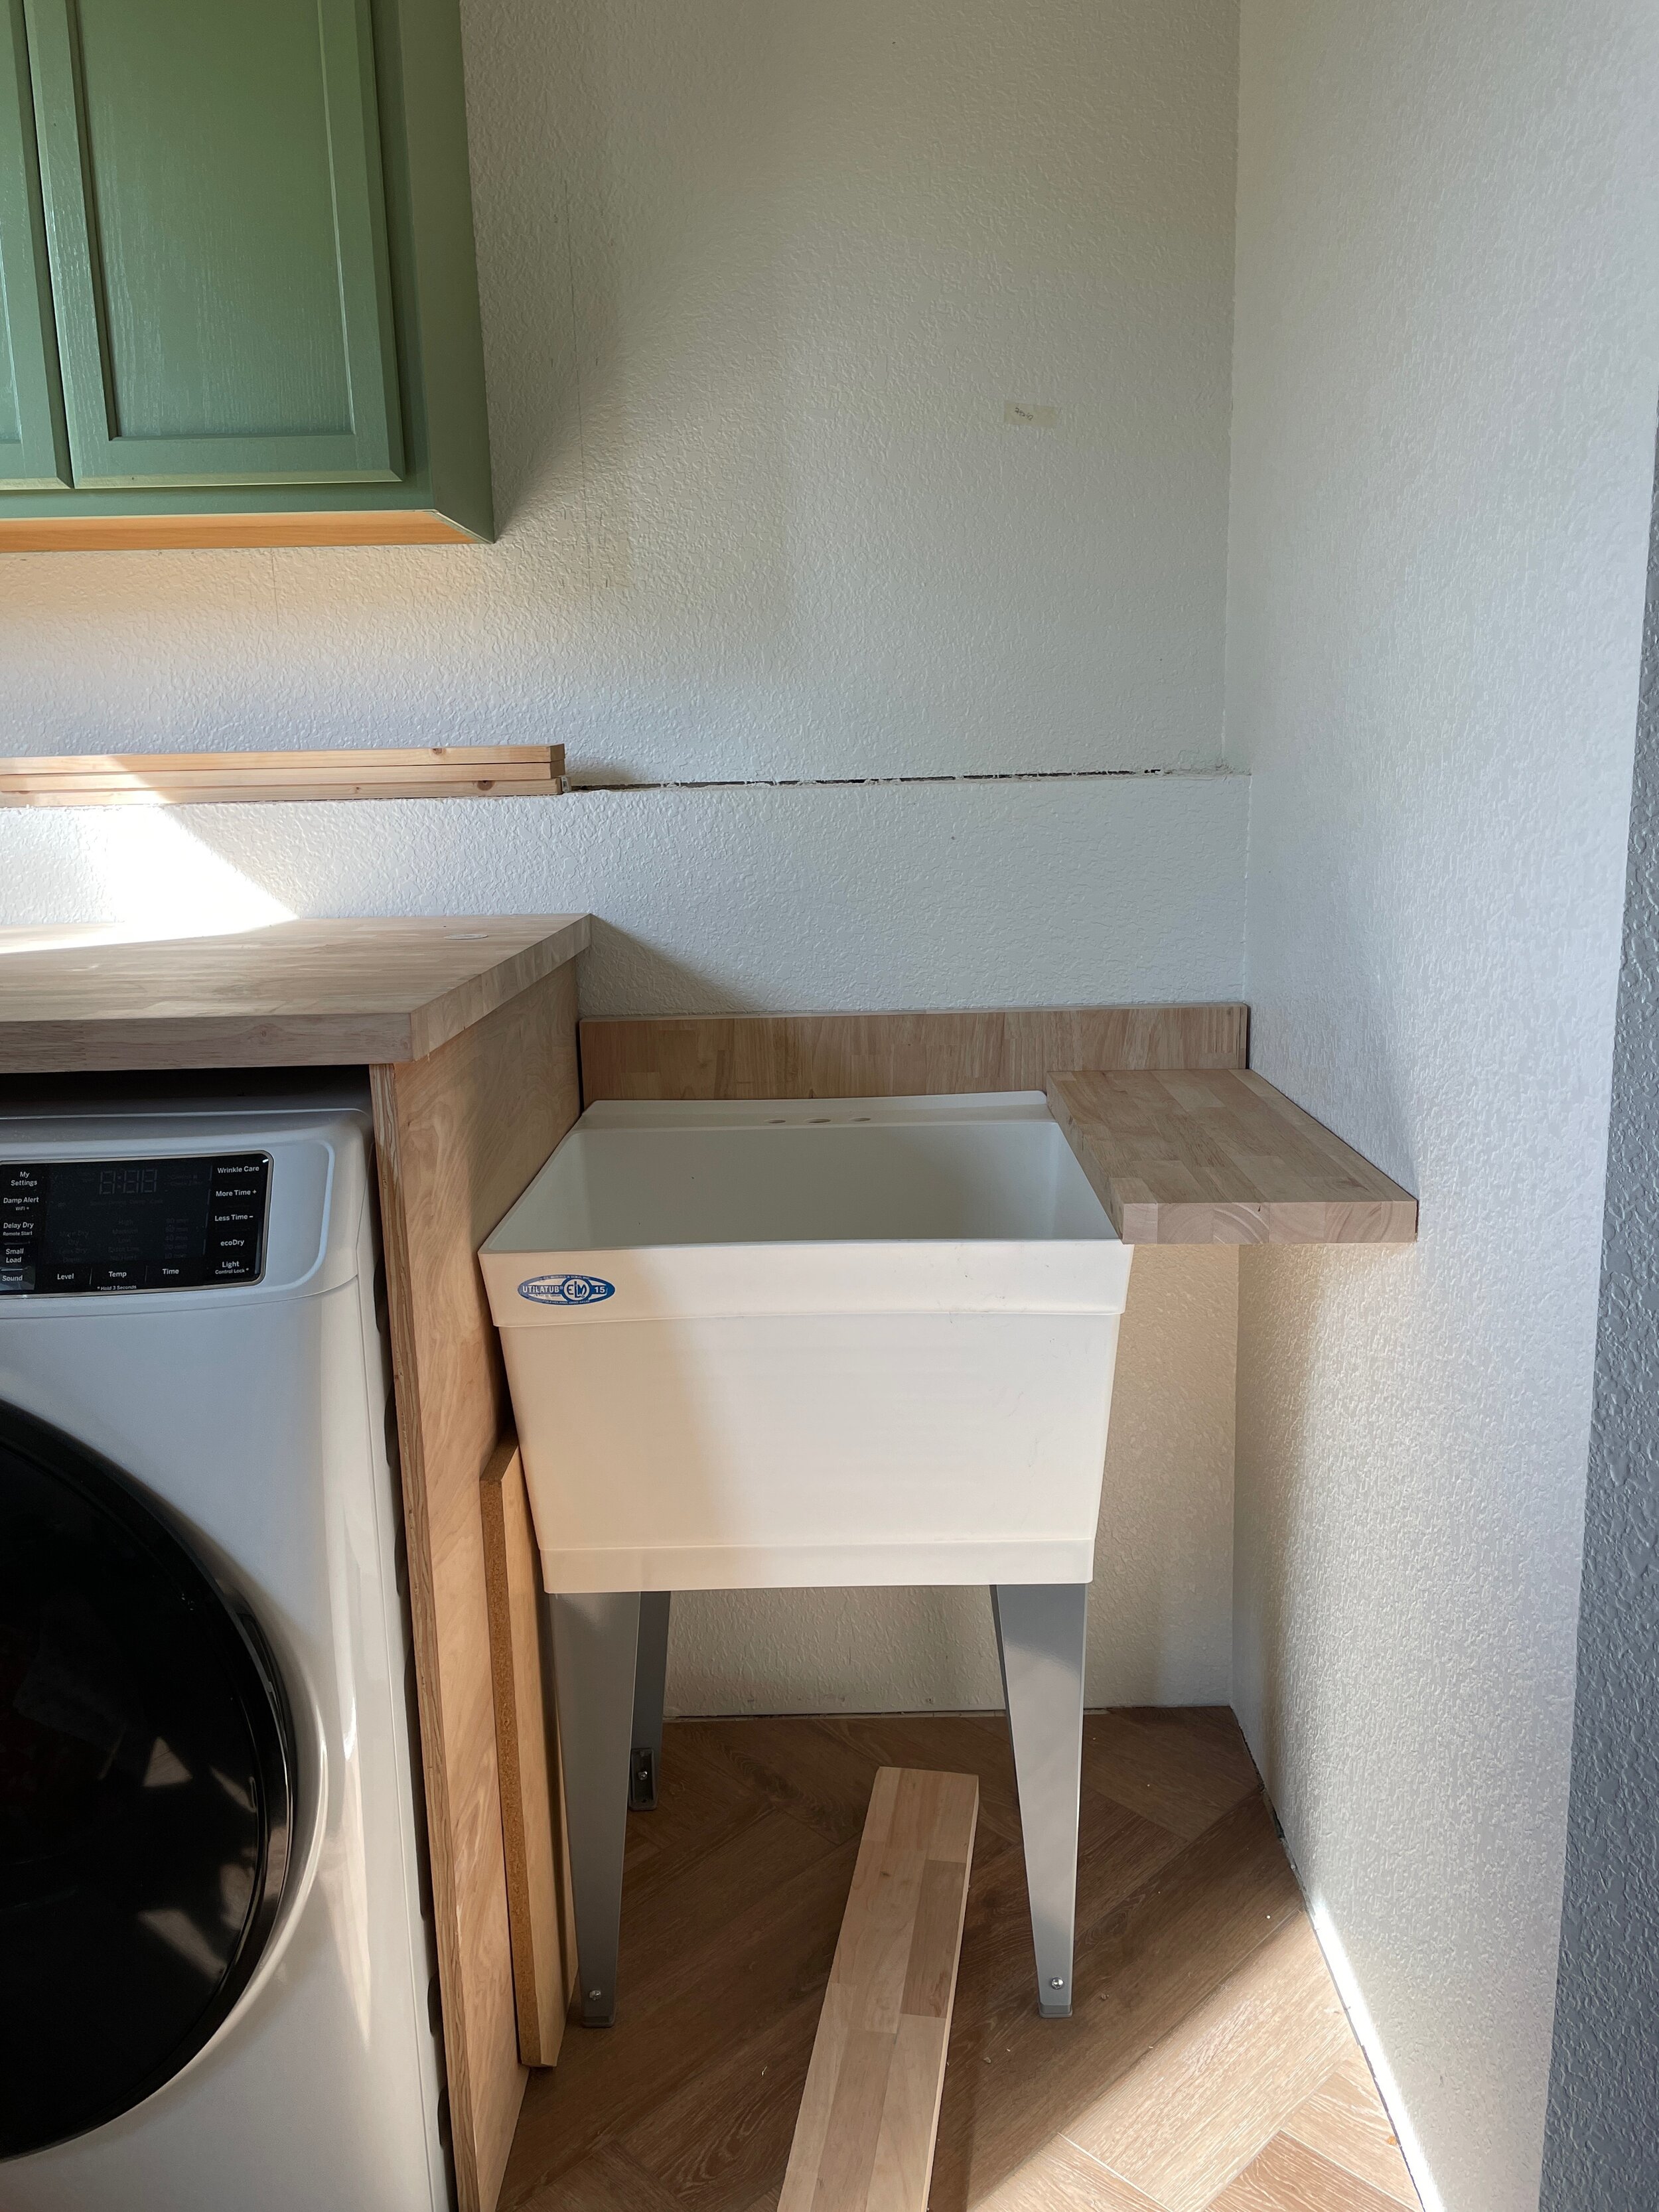

The utility sink needed to sit away from the wall about an inch and a half so Austin used left over butcher block as a backsplash. The countertop to the right of the sink was also a scrap from the laundry counter surface.


To turn the pony-wall into an architectural feature that looks like it may have always been there, Austin used maple plywood to trim it out. He used scraps from the counter support. To make the joints look seamless, he cut the pieces at an angle.
The Desk Wall
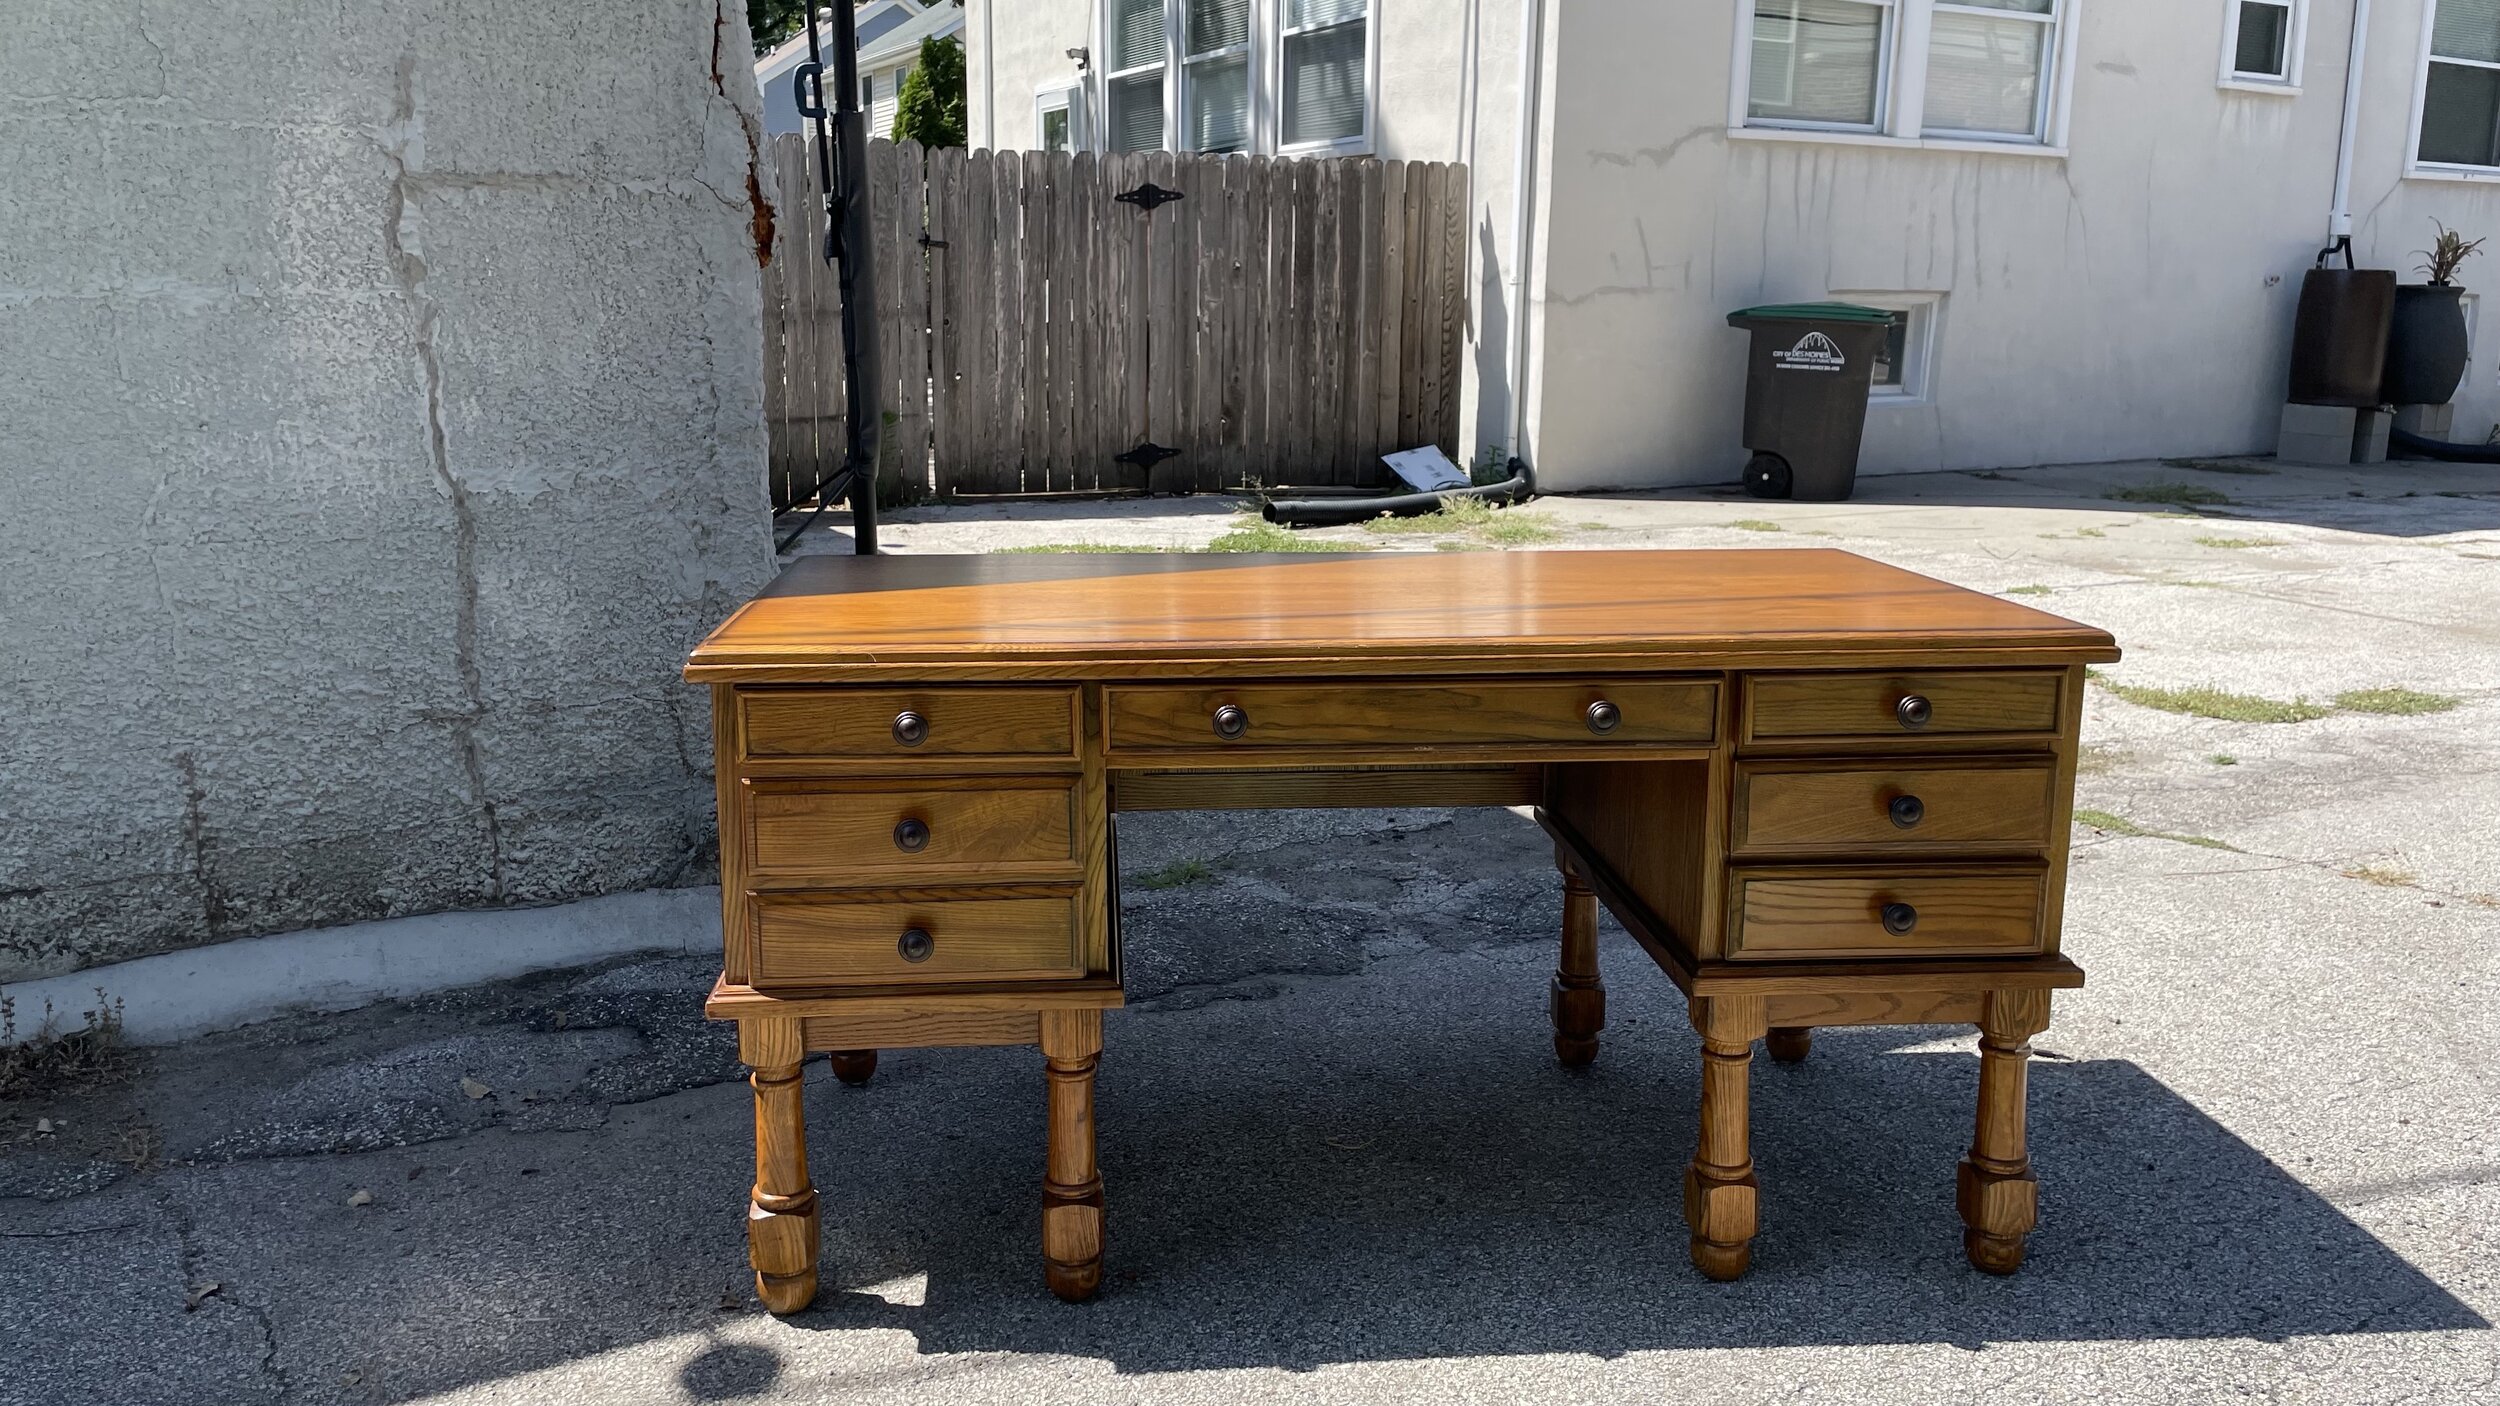
Refinishing the Desk
We found perfect style and size desk for $75 secondhand. The only thing that wasn’t perfect about it was the honey oak finish. It needed to be reimagined to fit the room and to fit the house. I used Minwax Antique Wood Refinisher to strip the varnish and stain from the desk. It was a tedious job and took me a total of 8 hours. My initial plan was to stain it dark like the wood trim in the home. However, while I was stripping the desk, some moldings on the desk were actually plastic with faux paint. I wouldn’t be able to stain. Instead, I found a great, light green HGSW Livable Green and Austin and his dad sprayed it. It was shocking how much time it took me to get it ready for back and how LITTLE time it took Austin to paint it perfectly.


Austin and I mapped out where the shelves above the desk should go based on the desk height and width. We needed enough height for Chelsea’s computer but not too much that items would be too far from reach. The desk is 60” wide and the wall from corner to door casing is 68”. We measured out what 60” shelves, 54” shelves and 52” shelves. We felt the 52” was still large enough to be useful but balanced with the desk and wall.


The shelves are pine boards with white wash on them. Austin installed the brackets onto the studs and then installed the shelves directly into the wall and onto the brackets. These shelves are definitely not going anywhere.
I’m not going to share the Homeschool Wall because I feel like it will give too much away and there wasn’t much DIY other than putting furniture together. I can’t wait to show you every area finished and styled. It’s an elevated, functional and best of all, resourceful space. I couldn’t have pulled this room together without the cost-saving, time-saving and stylish options from Lowe’s. I hope you love it as much as I do. Let me know if you have any questions about how or why we did something!